
In the first part of this tutorial, I explained how to create slightly different versions of the same app. Make sure you read this first.
What I left out is to how to deal with assets. In this post, I will explain how to create different launch icons and other resources (e.g. in app icons and audio) depending on which configuration you build.
Launch Icon
Let’s start with the launch icon of the app.
Remember we created a custom build settings named LANGUAGE_CODE in the first part? We will use this flag now to make sure that we build our apps with the right assets.
For both app variants (Thai and Chinese), create a new asset catalog: Press Command + N > Asset Catalog. Name the file img-th.xcassets for Thai and img-zh.xcassets for Chinese. Make sure that the checkbox to add the assets to your target is ticked for both files.
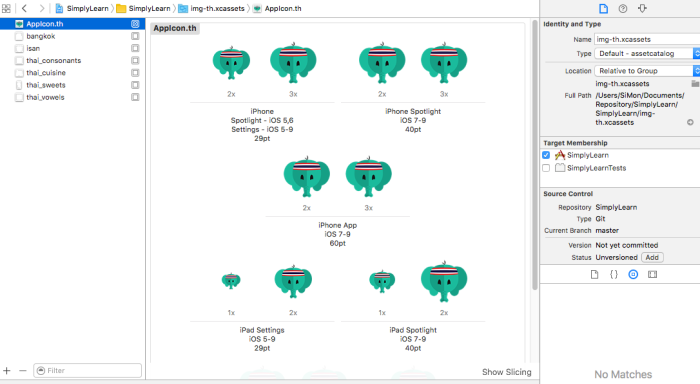
Now create a new launch icon by selecting + > New iOS Launch Icon. Name the icon for Thai AppIcon.th and the icon for Chinese AppIcon.zh.
Having done this, we need to tell the compiler to use the correct app icons. Go to the build settings as described in part 1. This time, search for “Asset Catalog” and select the build setting “Asset Catalog App Icon Set Name”. Put in the value AppIcon.${LANGUAGE_CODE}
Now we can build the apps one after another and it will show the right icon for each app. The problem is, Xcode will now package both launch icons in the app bundles, even though we only need one. This might not be as bad in this example, but imagine you had 30 apps like this. 29 unnecessary icons in each app? Sounds like a bad idea!
Easy way: Exclude the unnecessary assets from the build
The solution is a build setting named EXCLUDED_SOURCE_FILE_NAMES. If you only had two apps, you would now go ahead and exclude the unwanted files from the build like so:
Go to the build settings and select + > Add User-Defined Setting. Name the new setting EXCLUDED_SOURCE_FILE_NAMES. The value for the setting should be img-zh.xcassets for Thai and th.xcassets for Chinese (Debug und Release get the same value)
But again imagine you had 30 apps. Then you would have exclude 29 asset catalogs for each of the 30 apps. Not funny!
Advanced way: Include the necessary assets
But there is a better (and a bit trickier) way. If you have only 2-4 apps, you can skip this step and go with the easy way.
First, delete the values you put in the EXCLUDED_SOURCE_FILE_NAMES setting in the last step. Now give all your app variants (Thai debug, Thai release, Chinese debug, Chinese release) the same value: img-*.xcassets. This works because EXCLUDED_SOURCE_FILE_NAMES understands the * as a wildcard. That means you excluded all assets from your build.

Then, create another user-defined build setting named INCLUDED_SOURCE_FILE_NAMES. Give this the value img-${LANGUAGE_CODE}.xcassets.
Now it will exclude all your assets first and then include only the necessary assets in your build. This is because the variable INCLUDED_SOURCE_FILE_NAMES is applied after EXCLUDED_SOURCE_FILE_NAMES.
(Site note: You might ask, why all the trouble? Why not leaving the xcassets from the build target in the first place instead of adding it and excluding it later? This is because the compiler complains when you don’t include your launch icon in the target.)
In-app Icons
If you have any icons you want to be different in your app variants, this is very easy. Just create them in your assets along with your launch icon. During the build, the correct assets will be chosen.
Other resources
In our app, we have two other resources that needed to be loaded differently depending on the app variant: A database file (we use Realm) and a bunch of audio files.
These files you can simply not add to your target and add them via a script:
- Create a new group in your project and name it “data” Create a sub group for each of your variants. In our example, it would be data/th and data/zh. Put all your data in these sub groups.
- You have to create the folders physically in your folder, not only in Xcode. Since this might lead to trouble if you do this manually, I recommend the Command line tool Synx to rebuild your project structure in the finder. As in the doc described, use it like this: $ synx path/to/my/project.xcodeproj
- Now create a new build phase: Go to the settings of your project target (the place where you previously added the build settings) and select “Build Phases”. Select + > New Run Script Phrase and the following shell script in the new build phase:
cp -r "${PROJECT_DIR}/data/${LANGUAGE_CODE}"
"${BUILT_PRODUCTS_DIR}/${PRODUCT_NAME}.app"
This will copy the resources in your data folder into your app bundle, but only the ones needed for each specific app variant of course.
Sigh! It’s done. I have to say as much as I like Swift, creating build variants is a huge pain in the ass with iOS. It is so much smoother with Android + Gradle.
If you feel I did things too complicated or you know any smart hacks, please let me know!

Haahaahh. I’m not too bright today. Great post!
LikeLike
Use pods or targets!
LikeLike